So I have been meaning to get back to the blog for some time now, but life just keeps getting in the way really.
First distraction: the lovely little Matilda Hazel Anne born nearly a year ago now on Halloween 2012. She made herself known every time I tried to sit down to sew by doing gymnastics on my bladder or practicing her goal kicks into my sides. I think it is safe to say she was not a fan of me sewing.
Now that she is a little mover she wants me to explore, climb, crawl, and dance with her instead of sewing. My plan is to get her into sewing early so we can do that together. {Maniacal Laugh}
Second distraction: my hubbie opened a southern BBQ food truck. The Big Smoke Food Truck. I knew it was coming I just didn't know how much time and energy it would suck from us to get things rolling. I think it was a bit of our own fault for wanting to do so much ourselves, but the end results made it worth it! A bonus of this was I ate like a southern queen, the downside was no time to sew.
Third distraction: at 4 months old Matilda took her first plane ride. We made the trek to Melbourne, Australia to see my hubbie's family and introduce her to the Aussie crew for a month. She was a trooper & charmed her way around the world. I think it helps when your baby is the youngest flying but the best behaved. The flight crews always loved her and would cluck over her throughout the flight. One of them even held her for me while i went to the loo. Amazing!
Fourth distraction: no plan, no motivation. This is completely my fault. I had the fabric, thread, rulers, machine, but no idea what I wanted to do. Actually no, too many things I wanted to do but no solid plan on how to do them.
Enter stage left - the amazingness that is Tula Pink's new book City Sampler 100 Modern Blocks. I fell in love. Hard. I knew it would get me out of my funk & back into my sewing room. So after digesting it cover to cover I made a plan & went to work. I am not great at remembering to take photos. I will have to learn to stop here & there and photograph what I'm doing. I made enough blocks to do a baby quilt for a friend and that was that. I am hooked on quilting again.
After that quilt got the juices flowing I stumbled on an old project I had on a shelf. Echino 1/2 yards just waiting for the Stained QAL I wanted to do so badly. I got to work figuring out the pieces since i was using directional fabric (would NOT do this again for that pattern!!) and ordered lovely linen for the sashing bits from the lovely Pam at Mad About Patchwork. She has the best shipping. It can get here in no time at all.
Anywho, I will make sure to get a few photos of this man quilt shortly. I'm calling it the Man Quilt since it is a quilt for my hubbie. He thinks it is about time we kept a quilt I made so voila.
A spot to share my adventures (and misadventures) in quilting and crafting. CONTACT: allisonbright {at} gmail {dot} com
Showing posts with label quilt. Show all posts
Friday, October 18, 2013
Wednesday, January 25, 2012
Mouthy Stitches - first glimpse
Okay here is my fabric pull for the Mouthy Stitches zipper pouch swap as promised:
The photo is rubbish - i should have taken it during the day in proper daylight. Since I didn't the flash washed out some of the fabrics and some look darker (wtf?!?) That aside I am happy with how I managed to make the fabrics look a bit like the pattern I will be going for - a bonus.
I think I am ever so slightly leaning towards the aqua Kona Crush fabric for the main fabric, and will use the darker fabric on the right in the scrappy log cabin. I think the acorns will now feature as an interior pocket, and maybe a bit on the back.
The back is a secret project until i get the chance to test out some ideas - i'm possibly getting overly ambition for my skills so I want to quietly try it out and play around before I decide. One good thing is that I am super sure I'm on the right track for my partner. woo hoo!
I am hoping to get some cutting ans sewing done for this on the weekend after a trip to Perth for some fabric provisions. Why don't the local stores stock a range of solids?!?!? If I can't find what I want in Perth I'm heading back to Pam at Mad About Patchwork for some more goodies. I have a Kona colour card thanks to Ki so its much easier to internet shop.
The photo is rubbish - i should have taken it during the day in proper daylight. Since I didn't the flash washed out some of the fabrics and some look darker (wtf?!?) That aside I am happy with how I managed to make the fabrics look a bit like the pattern I will be going for - a bonus.
I think I am ever so slightly leaning towards the aqua Kona Crush fabric for the main fabric, and will use the darker fabric on the right in the scrappy log cabin. I think the acorns will now feature as an interior pocket, and maybe a bit on the back.
The back is a secret project until i get the chance to test out some ideas - i'm possibly getting overly ambition for my skills so I want to quietly try it out and play around before I decide. One good thing is that I am super sure I'm on the right track for my partner. woo hoo!
I am hoping to get some cutting ans sewing done for this on the weekend after a trip to Perth for some fabric provisions. Why don't the local stores stock a range of solids?!?!? If I can't find what I want in Perth I'm heading back to Pam at Mad About Patchwork for some more goodies. I have a Kona colour card thanks to Ki so its much easier to internet shop.
Labels:
colour,
kiley,
mad about patchwork,
mouthy stitches,
owl,
pouch,
quilt,
swap
Sunday, December 18, 2011
Chevron Quilt
My little sister decided she wanted to make a quilt for one of her teachers, so I set out to try to find something simple she could tackle and fast enough to make that we could get it done in the 2 weeks notice she gave me (silly sister). We decided to keep costs down we'd do it in solids on the front and a solid piece of patterned fabric for the back.
She was inspired by a quilt she saw online in greys black white and yellow with scattered half triangles. It was beautiful but when we picked up the fabrics we forgot picture and both of our goldfish memories forgot it needed 2 shades of grey. We came home with just yellow, off white 1 grey and black. The result wasn't great - too dark with either no contrast (the black & grey) or too much (the black & off white). It was a big pile of yuck on the design board and we had already sewn all of the blocks together. My sister went to work in a less than delighted mood that night and I kept at it trying to make it work. Then it hit me - I had seen a sweet pattern on Cluck Cluck Sew for a zig zag baby quilt that used up half square triangles, so maybe with a few tweak I could make something out of our mess.
I ran over to her shop and purchased the pattern - and was i lucky - she was having a half price sale one day only. i picked up 4 patterns while i was there (I'm a sucker for a sale) and within the hour was fixing up the quilt with this result (pre-quilted):
I echo quilted the zigs and zags and got it done just in the nick of time to machine sew on the scrappy binding using a decorative stitch and scrappy binding. Hew teacher loved it (she cried) and told her it was perfect for her baby's room as she was having a boy. I wasn't able to get any of pictures of the finished quilt myself so my sister took some on her iPhone before she wrapped it.
She was inspired by a quilt she saw online in greys black white and yellow with scattered half triangles. It was beautiful but when we picked up the fabrics we forgot picture and both of our goldfish memories forgot it needed 2 shades of grey. We came home with just yellow, off white 1 grey and black. The result wasn't great - too dark with either no contrast (the black & grey) or too much (the black & off white). It was a big pile of yuck on the design board and we had already sewn all of the blocks together. My sister went to work in a less than delighted mood that night and I kept at it trying to make it work. Then it hit me - I had seen a sweet pattern on Cluck Cluck Sew for a zig zag baby quilt that used up half square triangles, so maybe with a few tweak I could make something out of our mess.
I ran over to her shop and purchased the pattern - and was i lucky - she was having a half price sale one day only. i picked up 4 patterns while i was there (I'm a sucker for a sale) and within the hour was fixing up the quilt with this result (pre-quilted):
I echo quilted the zigs and zags and got it done just in the nick of time to machine sew on the scrappy binding using a decorative stitch and scrappy binding. Hew teacher loved it (she cried) and told her it was perfect for her baby's room as she was having a boy. I wasn't able to get any of pictures of the finished quilt myself so my sister took some on her iPhone before she wrapped it.
Wednesday, November 23, 2011
Snow Day Playtime
It has been a while since I blogged. I blame daylight savings time. I can't stand going to work when it's light and feeling like I'm missing the day, and I don't like getting home in the dark feeling like I missed the whole day. It sucks big time. So, daylight savings time has sucked all the crafty life out of me lately.
That and the fact that my mum decided to do an intro quilting class (yeay mum!) which has meant my craft room is now her homework room. I forgot how heavy the homework for intro classes is - some weeks she had to finish 3 blocks, which not getting home at night until 6.30 or 7 some nights meant some epic quilting sessions. Hew sampler quilt is looking amazing! I will have to get it up on the design wall to sneak a few pictures.
The biggest bonus of my mum taking this class is that she bought a new Bernina 330 sewing machine that resides in my house. Score! Until mum decides if sewing is for her I get to keep it here to utilize. If she decides it isn't for her I'm going to buy the machine from her in installments. Woo woo!
Today was the first real snowy day in my neck of the woods which meant havoc on the driving to work this morning. We passed ditched cars, and kept hearing bad news reports all the way in. When we hit a big hill with stopped traffic we deiced to go home. Good thing too because the cars were stopped due to icy conditions on the hill and ditched cars, and on the way home it was near white-out conditions. Boo-urns! If only I could have convinced the driver to turn around earlier. Oh well. I called my boss to ask what it was like in town and it didn't sound promising, so she told me to turn around and stay put at home which I did gladly. I admit I am a worrier as a passenger in the winter driving months, but I think I was okay this morning.
Once I brushed off the snow and got my boots off I immediately got my craft room ready for a major sewing session. I had a new ruler and book that I have been meaning to use as well as some Anna Maria Horner Innocent Crush fabric so I set to it, and this is the result:
Since this photo 2 things have happened: 1) my camera died, and 2) I finished sewing this all together. It always amazes me how much I can accomplish in an unexpected day away from work, but a planned day I get nothing done. Sheesh. So, I'm off to the fabric shop this weekend (the 25% off coupon I have doesn't hurt) to get fabric for 2 borders for this guy. I want it a little bigger for a good snuggling quilt.
I got the idea from Strip-Smart Quilts by Kathy Brown (The Patchwork Place) and used a 90 degree triangle ruler.
So until the camera gets fixed (aka getting charged batteries) no more photos to share. I hope to have this one done this weekend if all goes to plan, but as things rarely do I'd be happy with it being done by the end of next week. It is a good distraction from thinking about my sister who is about to pop out my first nephew. Can't wait to see little Jasper on this side of the flesh.
That and the fact that my mum decided to do an intro quilting class (yeay mum!) which has meant my craft room is now her homework room. I forgot how heavy the homework for intro classes is - some weeks she had to finish 3 blocks, which not getting home at night until 6.30 or 7 some nights meant some epic quilting sessions. Hew sampler quilt is looking amazing! I will have to get it up on the design wall to sneak a few pictures.
The biggest bonus of my mum taking this class is that she bought a new Bernina 330 sewing machine that resides in my house. Score! Until mum decides if sewing is for her I get to keep it here to utilize. If she decides it isn't for her I'm going to buy the machine from her in installments. Woo woo!
Today was the first real snowy day in my neck of the woods which meant havoc on the driving to work this morning. We passed ditched cars, and kept hearing bad news reports all the way in. When we hit a big hill with stopped traffic we deiced to go home. Good thing too because the cars were stopped due to icy conditions on the hill and ditched cars, and on the way home it was near white-out conditions. Boo-urns! If only I could have convinced the driver to turn around earlier. Oh well. I called my boss to ask what it was like in town and it didn't sound promising, so she told me to turn around and stay put at home which I did gladly. I admit I am a worrier as a passenger in the winter driving months, but I think I was okay this morning.
Once I brushed off the snow and got my boots off I immediately got my craft room ready for a major sewing session. I had a new ruler and book that I have been meaning to use as well as some Anna Maria Horner Innocent Crush fabric so I set to it, and this is the result:
Since this photo 2 things have happened: 1) my camera died, and 2) I finished sewing this all together. It always amazes me how much I can accomplish in an unexpected day away from work, but a planned day I get nothing done. Sheesh. So, I'm off to the fabric shop this weekend (the 25% off coupon I have doesn't hurt) to get fabric for 2 borders for this guy. I want it a little bigger for a good snuggling quilt.
I got the idea from Strip-Smart Quilts by Kathy Brown (The Patchwork Place) and used a 90 degree triangle ruler.
So until the camera gets fixed (aka getting charged batteries) no more photos to share. I hope to have this one done this weekend if all goes to plan, but as things rarely do I'd be happy with it being done by the end of next week. It is a good distraction from thinking about my sister who is about to pop out my first nephew. Can't wait to see little Jasper on this side of the flesh.
Saturday, October 1, 2011
Jasper Quilt
I just cast the last stitch on my nephew-to-be Jasper's quilt. It's not exactly what I pictured when I started, but I am happy with the result. Hopefully my sister likes it.
It is my second go at machine binding and I have to say it went much smoother this go around. I think next time I would cut the binding even wider - maybe even up to 3 inches just to give more wiggle room when stitching. Next up is a quick wash through the machine to get rid of any loose threads and copious amounts of cat fluff as Malcolm decided it was a nice place to snuggle up last night. Silly cat.
Please excuse the sad excuse for pictures of the quilt - photo booth on the laptop definitely has its limitations!
The front - I decided after finishing the top with the posts in that it wasn't what I liked so I had to unpick soooo many stitches, and redo all the rows. It was totally worth it though, because it looks way more modern without them.
Next up are napkins and coasters for little sister who is moving into her first apartment today. So exciting. As a bonus she is in school for esthetics - yeay to not paying ridiculous prices for waxing anymore. Hubbie has even donated his legs to her for waxing practice - now that will be an hilarious afternoon!!
It is my second go at machine binding and I have to say it went much smoother this go around. I think next time I would cut the binding even wider - maybe even up to 3 inches just to give more wiggle room when stitching. Next up is a quick wash through the machine to get rid of any loose threads and copious amounts of cat fluff as Malcolm decided it was a nice place to snuggle up last night. Silly cat.
Please excuse the sad excuse for pictures of the quilt - photo booth on the laptop definitely has its limitations!
The front - I decided after finishing the top with the posts in that it wasn't what I liked so I had to unpick soooo many stitches, and redo all the rows. It was totally worth it though, because it looks way more modern without them.
I wanted to have a fully reversible quilt, so I pieced together a scrappy back using the solids from the front as well as the left over prints (in the center strip). I think I like the back better than the front just because it is so out there.
As much of a close up as photo booth would allow. I think the Greek key style quilting really worked on the front, and doesn't look too bad on the back. I was concerned when I first started that it would seem to random on the back, but I ended up liking the effect. It has shown me that my quilting skills need improvement, so I think I might make some quilted placemats to practice on. I do love the bamboo batting I picked up at Wilton Creek Fabrics. It seems to glide through better than the cotton stuff I had for my sampler quilt many moons ago.
Next up are napkins and coasters for little sister who is moving into her first apartment today. So exciting. As a bonus she is in school for esthetics - yeay to not paying ridiculous prices for waxing anymore. Hubbie has even donated his legs to her for waxing practice - now that will be an hilarious afternoon!!
Monday, September 5, 2011
You Don't Know Jack
Hubster has been at me for ages to make him a union jack quilt ever since he saw a pillow in a magazine. Given the odd angles to the union jack I couldn't quite figure out a pattern on my own in my few attempts and shelved the project until I could find a tutorial or pattern I liked. My other issue was that I am not a huge fan of red, white & blue together as it makes me think of the American flag vs. the British flag. (A condition of being Canadian I suppose). But when I saw the Jack tutorial I posted earlier I started to get excited about the possibilities of fabric combinations. (Please check out the original tutorial at Lily's Quilts here)
I have been holding onto some batiks I picked up at the local quilt store which I have been hoarding uncut as I didn't know if I could get anymore of them. I decided this project would be the right time to use so I created this:
I used the purple and teal colourways and added a Kona Solids stripe in ash left over from this project. I thought using batiks would be a smarty-pants idea as they don't really have a front/back. Here is where it went wrong. The pattern requires precise cutting (check, did that) and with that, definite ways to use the precision cut pieces. I should have marked the batiks 'right side' to keep the triangles in the orientation they required. Oops! So in the end I had backwards blocks and after resewing had to cut down correct blocks to match the bodged together blocks. In the future I will make sure to keep proper labels on all my cuttings. Excellent lesson learned.
Even with these issues I still really like the block, and now that I know what not to do I think I might try to make this into a quilt for hubbie. I am trying to find more of this batik before I totally commit to that, and so far I've only seen a few of the other colours left at the quilt shop (who I am not happy with at the moment, but that's another story). So, I might have to rethink the blocks a bit - mix batiks & non-batiks? have all blocks different? have all blocks the same? So many possibilities. I think I might make this first block into a small wall hanging in the meantime since these colours were the ones missing at the shop (always the way). Actually, that is another lesson learned - if you adore a fabric buy yardage up since it might not be around anymore when you finally get around to using it!
I have been holding onto some batiks I picked up at the local quilt store which I have been hoarding uncut as I didn't know if I could get anymore of them. I decided this project would be the right time to use so I created this:
I used the purple and teal colourways and added a Kona Solids stripe in ash left over from this project. I thought using batiks would be a smarty-pants idea as they don't really have a front/back. Here is where it went wrong. The pattern requires precise cutting (check, did that) and with that, definite ways to use the precision cut pieces. I should have marked the batiks 'right side' to keep the triangles in the orientation they required. Oops! So in the end I had backwards blocks and after resewing had to cut down correct blocks to match the bodged together blocks. In the future I will make sure to keep proper labels on all my cuttings. Excellent lesson learned.
Even with these issues I still really like the block, and now that I know what not to do I think I might try to make this into a quilt for hubbie. I am trying to find more of this batik before I totally commit to that, and so far I've only seen a few of the other colours left at the quilt shop (who I am not happy with at the moment, but that's another story). So, I might have to rethink the blocks a bit - mix batiks & non-batiks? have all blocks different? have all blocks the same? So many possibilities. I think I might make this first block into a small wall hanging in the meantime since these colours were the ones missing at the shop (always the way). Actually, that is another lesson learned - if you adore a fabric buy yardage up since it might not be around anymore when you finally get around to using it!
Monday, August 22, 2011
Nifty Napkins in an Hour
I decided I needed a project to bust through some of my stash and get the creative juices flowing trying to do some fabric match ups. The result is a new pack of napkins in browns, greens, blues, and yellow. I'm pretty happy with them even though I cheated slightly and put a few from 1 fabric line together (Geo Grand by Daisy Janie). The blue/green floral fabric is Zinnia Path by Paula Prass, and I'm not sure what the other fabric line is. UPDATE: mystery solved the fabric line is Free to Grown by Nancy Mims. They were part of a birthday present last year, and I can't seem to find any selvedges anywhere. Next step is getting back to little sister's quilt back, and finally deciding on a pattern for middle sister's baby quilt. Busy busy.
Saturday, August 20, 2011
Little Sister Wonky Log Cabin Quilt
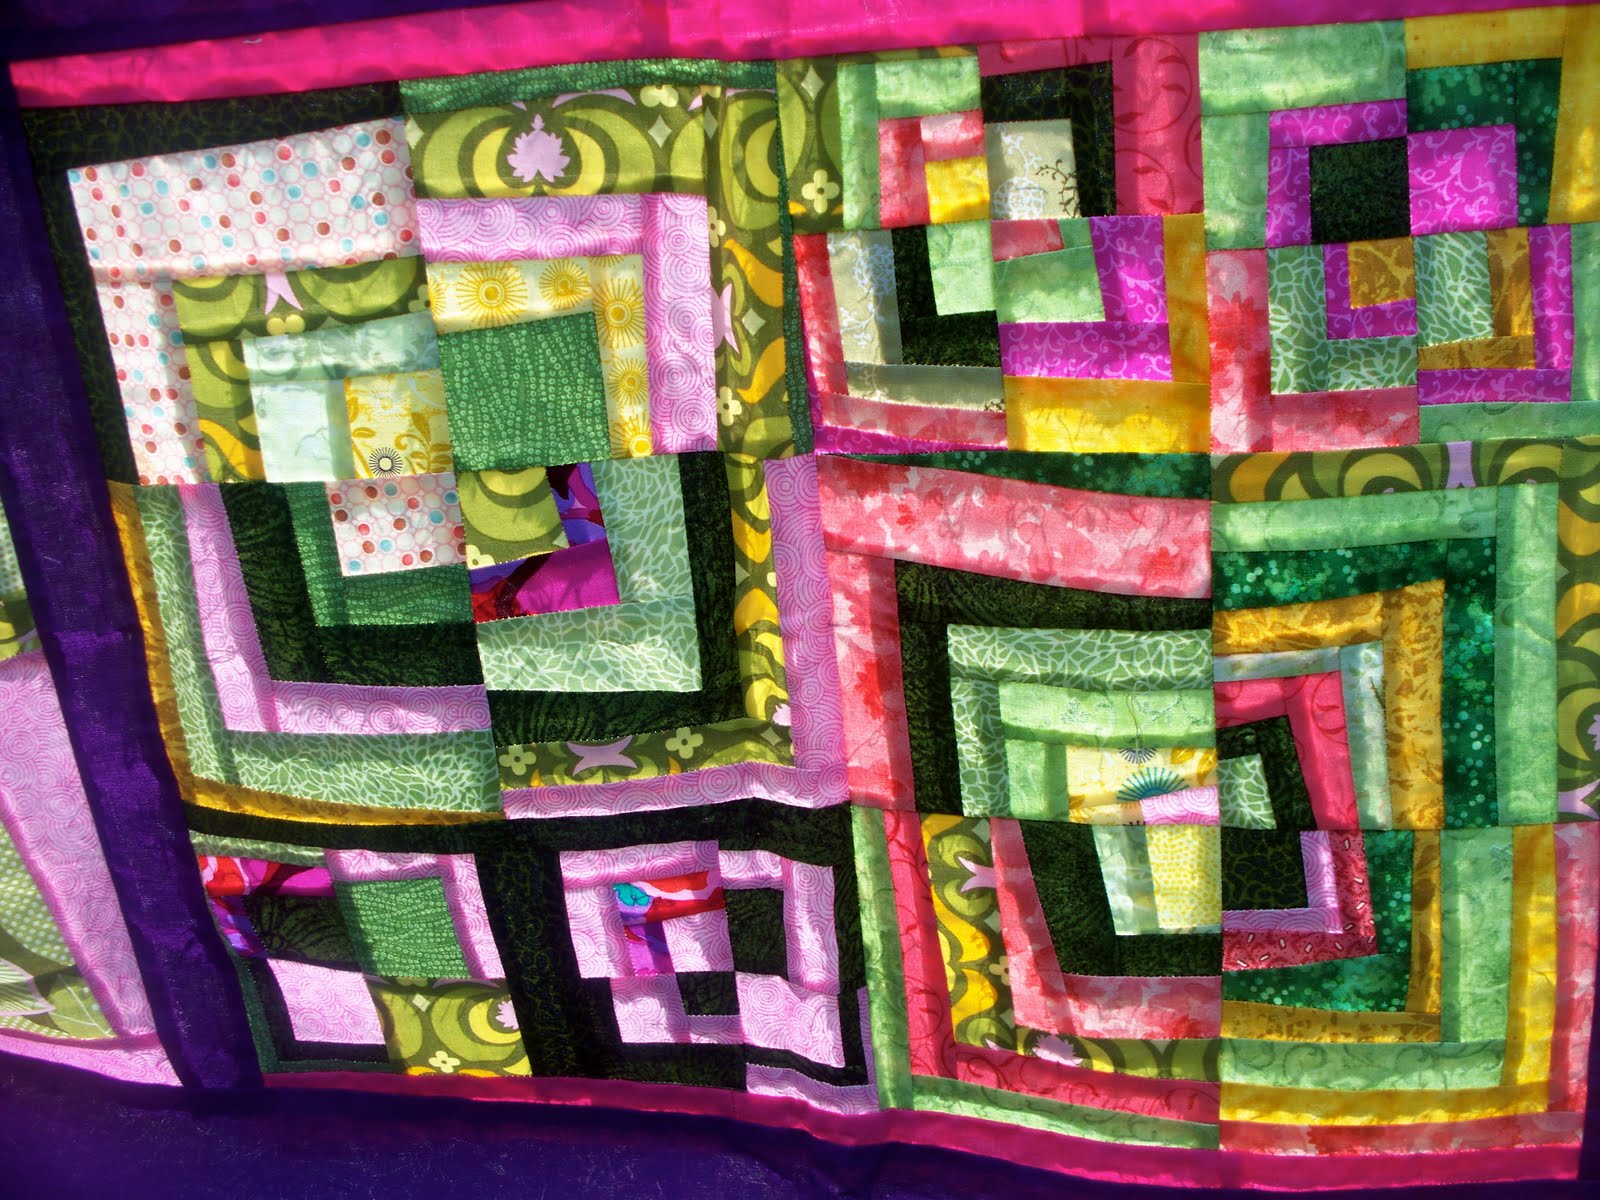
This quilt is a WIP for over a year that now has a deadline. My little sister is moving into her first apartment and I want to get this finished up for her move in October. It is quarter wonky log cabin blocks made from all of my scraps and a few fat quarters in my stash with a purple solid background fabric. Windy day = blurry photos!
The top has been done for months, and now I'm tackling the back. My goal is to make a quilt that can be reversible. That way if little sis gets bored with the front she can flip it & vice versa. I've already got the quilting pattern idea in my head - just need to finish the back and find someone to quilt it for me since this is too big & I'm not experienced enough to machine quilt it myself.
So far I have a few blocks done for the back and have pulled some more scraps for the back. I have a bit of purple left and will be using some more bright pink (as in the border of the top middle block on the front) to get it all together. I'm running out of time, but hopefully I can get this completed by September, buy the batting and find a long arm quilter to complete it. Then the dreaded binding phase (yuck!) and it is all ready. Fingers crossed!
The top has been done for months, and now I'm tackling the back. My goal is to make a quilt that can be reversible. That way if little sis gets bored with the front she can flip it & vice versa. I've already got the quilting pattern idea in my head - just need to finish the back and find someone to quilt it for me since this is too big & I'm not experienced enough to machine quilt it myself.
So far I have a few blocks done for the back and have pulled some more scraps for the back. I have a bit of purple left and will be using some more bright pink (as in the border of the top middle block on the front) to get it all together. I'm running out of time, but hopefully I can get this completed by September, buy the batting and find a long arm quilter to complete it. Then the dreaded binding phase (yuck!) and it is all ready. Fingers crossed!
Baby Quilt Bonanza - Part 2
The quilt is complete and off to Australia. The machine sewn binding worked decently, though I will need more practice as I still cannot sew in a straight line. All in all I am pretty happy with the end result and thrilled that I finished it in time to send it with my father-in-law instead of having to pay to ship it.
Here are some shots of the process I wasn't able to load before:
And here is the finished product:
Sorry the colours are a bit off from the afternoon sun coming in that day.
Here are some shots of the binding grey thread on front & blue on the back:
So, onto the next baby quilt. Luckily I have a longer time frame for this one so I'm going to tackle a tougher pattern I think. I'll try to post progress photos as I go.
Here are some shots of the process I wasn't able to load before:
And here is the finished product:
Sorry the colours are a bit off from the afternoon sun coming in that day.
Here are some shots of the binding grey thread on front & blue on the back:
So, onto the next baby quilt. Luckily I have a longer time frame for this one so I'm going to tackle a tougher pattern I think. I'll try to post progress photos as I go.
Sunday, August 7, 2011
Baby Quilt Bonanza - Part 1
After a marathon of sewing the quilt for my sister in-law is finished. I've quilted it, did the binding, and washed it to make sure there are no dyes left in it, or loose threads. Phew.
I must say that my husband was a trooper for taking care of the pets, and feeding me on Friday while I sewed all day - last day of vacation. So now the package is ready to be delivered to Melbourne in the coming weeks when my father-in-law goes back home after a whirlwind visit.
The front pre-binding. I used this pattern because I think it looks like stacks of books, and my brother and sister in-law have so many books at their house, or did when I visited in 2009. Perhaps some have gone to make room for the upcoming bubs, who knows. I think I'm going to call it 'Red Riding Hood' as that was my inspiration for the colours, and say 'to the bookworm to be' since I don't know what her name will be.
For the back I used selvedge to selvedge strips of the fabrics from the front. I think that make it more useful as a baby quilt to be totally reversible. I did straight-ish line quilting so it would look good on the top, but I don't think it looks too bad on the back. The one pre-planned aspect I did get right was to have these stripes facing the opposite to the 'books' on the front so there were seams lying on top of seams. For the spacing I just eyed the front of the quilt to try to make the lines look good against the 'books'. All in all I'm pretty happy with the results being this is my 2nd completed quilting project.
I will get some photos of the binding and the washed completed project up soon. I copied a technique I saw on an antique quilt in Perth where they had zigzag sewed the binding on. It looked so wonky & adorable I knew I had to try it. I won't lie - the binding did not go well as far as it being super equal all the way around. I cannot sew in a straight line to save my life. Hence all of the 'wonky' quilt patterns I like. I think more of the problem came from my squaring up not really being square, but who wants a cookie cutter quilt - right? This one has heaps of personality. Or so I keep telling myself.
Here is one of Crosby at the end of the day of sewing. One tired little guy.
I must say that my husband was a trooper for taking care of the pets, and feeding me on Friday while I sewed all day - last day of vacation. So now the package is ready to be delivered to Melbourne in the coming weeks when my father-in-law goes back home after a whirlwind visit.
The front pre-binding. I used this pattern because I think it looks like stacks of books, and my brother and sister in-law have so many books at their house, or did when I visited in 2009. Perhaps some have gone to make room for the upcoming bubs, who knows. I think I'm going to call it 'Red Riding Hood' as that was my inspiration for the colours, and say 'to the bookworm to be' since I don't know what her name will be.
For the back I used selvedge to selvedge strips of the fabrics from the front. I think that make it more useful as a baby quilt to be totally reversible. I did straight-ish line quilting so it would look good on the top, but I don't think it looks too bad on the back. The one pre-planned aspect I did get right was to have these stripes facing the opposite to the 'books' on the front so there were seams lying on top of seams. For the spacing I just eyed the front of the quilt to try to make the lines look good against the 'books'. All in all I'm pretty happy with the results being this is my 2nd completed quilting project.
I will get some photos of the binding and the washed completed project up soon. I copied a technique I saw on an antique quilt in Perth where they had zigzag sewed the binding on. It looked so wonky & adorable I knew I had to try it. I won't lie - the binding did not go well as far as it being super equal all the way around. I cannot sew in a straight line to save my life. Hence all of the 'wonky' quilt patterns I like. I think more of the problem came from my squaring up not really being square, but who wants a cookie cutter quilt - right? This one has heaps of personality. Or so I keep telling myself.
Here is one of Crosby at the end of the day of sewing. One tired little guy.
Thursday, August 4, 2011
Baby Quilt Beginnings
I got the fabric finally for the 2 baby quilts I am creating for the first babies of my sister and my sister-in-law. Exciting times as they are having the first sets of grandchildren on both sides. Craziness.
For my sister in-law in Australia:
She requested a red quilt, so hopefully she will like this combo of red, aqua, and grey. They are having a girl, and I think this is a good colour combo for the red room she will have. I'm going to make a pattern from Modern Quilting Bee Block Party. It will be the Uneven Coin block, but I'm going to call it a book block since my sister-in-law has a thing for books. Fingers crossed I can get it done in time to send it to Australia with my father-in-law to save on shipping!!
The second one will be for my middle sister. She is having a boy, so I've decided to bust out the brown Teeny Tiny Zoo I've been hoarding. I grabbed some solids from Perth on my road trip earlier today, and now I'm ready to go on it. Just need to decide on the pattern I want to do. Forgive the rubbish photo - need a new camera so I don't have to try to keep using Photobooth on the laptop. Not easy.
There is a brown, blue, green, orange and white solid to match all of the animals in the zoo fabric. My sister is doing a safari theme for the nursery so I think this is a good choice.
I will either be doing wonky log cabin blocks or rectangle blocks like on page 116 of the Winter 2010/2011 International Quilt Festival: Quilt Scene magazine. I've been waiting to try this pattern out, and I think I am always more successful at quilts that are irregular as I can never seem to cut a truly straight line. Just one of those things - I know my weakness.
Actually just looking at Moda Bakeshop I think I might have found something I like called Building Blocks. Love love love. I could alternate the teeny tiny zoo as a center & surrounding fabric. This could very well be the winner :) I might have to do them a bit wonky just to shake things up.
From Moda Bakeshop:
Will try to post updates as I get on with the quilts, but will be limited by the lack of a camera!
For my sister in-law in Australia:
She requested a red quilt, so hopefully she will like this combo of red, aqua, and grey. They are having a girl, and I think this is a good colour combo for the red room she will have. I'm going to make a pattern from Modern Quilting Bee Block Party. It will be the Uneven Coin block, but I'm going to call it a book block since my sister-in-law has a thing for books. Fingers crossed I can get it done in time to send it to Australia with my father-in-law to save on shipping!!
The second one will be for my middle sister. She is having a boy, so I've decided to bust out the brown Teeny Tiny Zoo I've been hoarding. I grabbed some solids from Perth on my road trip earlier today, and now I'm ready to go on it. Just need to decide on the pattern I want to do. Forgive the rubbish photo - need a new camera so I don't have to try to keep using Photobooth on the laptop. Not easy.
There is a brown, blue, green, orange and white solid to match all of the animals in the zoo fabric. My sister is doing a safari theme for the nursery so I think this is a good choice.
I will either be doing wonky log cabin blocks or rectangle blocks like on page 116 of the Winter 2010/2011 International Quilt Festival: Quilt Scene magazine. I've been waiting to try this pattern out, and I think I am always more successful at quilts that are irregular as I can never seem to cut a truly straight line. Just one of those things - I know my weakness.
Actually just looking at Moda Bakeshop I think I might have found something I like called Building Blocks. Love love love. I could alternate the teeny tiny zoo as a center & surrounding fabric. This could very well be the winner :) I might have to do them a bit wonky just to shake things up.
From Moda Bakeshop:
Will try to post updates as I get on with the quilts, but will be limited by the lack of a camera!
Saturday, July 23, 2011
Double Fat Jack
Subscribe to:
Posts (Atom)